Friday, February 27, 2015

Configure ActiveMQ Transport Connector With nio+ssl With Mutual Authentication

Introduction

In my previous blogs about ActiveMQ, I have covered the topics about how to setup high availability with various topologies and configuration. In this blog, I am going to explain in details about how to setup transport connection using nio+ssl. In detail I will explain the following areas:

  1. A brief introduction of nio+ssl transport
  2. Create SSL keystore and truststore files using keytool
  3. Enable SSL transport ActiveMQ with trusted clients
  4. How to run producer and consumers

NIO SSL Transport

NIO is the same as TCP except the New I/O Java library is use. The NIO provide better performance over TCP. In the ActiveMQ transport connector, we can replace with tcp by nio. nio+ssl is SSL [Secure Sockets Layer] over TCP using java New I/O packaging. This transport is recommended for the enterprise messaging system as it provide better security by encrypt the message over the wire.

The above figure illustrates the scenarios for mutual authentication between server and client. The client and server establish connection by exchanging the server and client certificates which are stored in the file broker.ts and client.ts for server and client, respectively.

Generate Keystore and Truststore

In order to achieve the mutual authentication, we need to generate 4 files:

  1. broker.ks : server keystore
  2. broker.ts : server trusstore
  3. client.ks : client keystore
  4. client.ts : client truststore

Here is the procedure to generate these files:

cd $ACTIVEMQ_HOME/conf
keytool -genkey -alias broker -keyalg RSA -keystore broker.ks
keytool -genkey -alias client -keyalg RSA -keystore client.ks
keytool -export -alias broker -keystore broker.ks -file broker_cert
keytool -export -alias client -keystore client.ks -file client_cert
keytool -import -alias broker -keystore client.ts -file broker_cert
keytool -import -alias client -keystore broker.ts -file client_cert

Modify activemq.xml


       ...


        ...


Start ActiveMQ

After you start the ActiveMQ server [by activemq start command], in the server log, you should see the following log:

2015-02-27 15:49:04,544 | INFO  | Refreshing org.apache.activemq.xbean.XBeanBrokerFactory$1@2c90f71b: startup date [Fri Feb 27 15:49:04 CST 2015]; root of context hierarchy | org.apache.activemq.xbean.XBeanBrokerFactory$1 | main
2015-02-27 15:49:05,672 | INFO  | PListStore:[/opt/app/amq/Transport/NioSsl/data/NioSsl/tmp_storage] started | org.apache.activemq.store.kahadb.plist.PListStoreImpl | main
2015-02-27 15:49:05,783 | INFO  | Using Persistence Adapter: KahaDBPersistenceAdapter[/amqdata/master-slave/data/kahadb] | org.apache.activemq.broker.BrokerService | main
2015-02-27 15:49:05,798 | INFO  | JMX consoles can connect to service:jmx:rmi://localhost:44444/jndi/rmi://localhost:11099/jmxrmi | org.apache.activemq.broker.jmx.ManagementContext | JMX connector
2015-02-27 15:49:06,563 | INFO  | KahaDB is version 5 | org.apache.activemq.store.kahadb.MessageDatabase | main
2015-02-27 15:49:06,581 | INFO  | Recovering from the journal ... | org.apache.activemq.store.kahadb.MessageDatabase | main
2015-02-27 15:49:06,605 | INFO  | Recovery replayed 634 operations from the journal in 0.036 seconds. | org.apache.activemq.store.kahadb.MessageDatabase | main
2015-02-27 15:49:06,751 | INFO  | Apache ActiveMQ 5.10.0 (NioSsl, ID:SANDBOXFUSEV01-33072-1425073746626-0:1) is starting | org.apache.activemq.broker.BrokerService | main
2015-02-27 15:49:06,803 | INFO  | Listening for connections at: nio+ssl://SANDBOXFUSEV01:61617?maximumConnections=1000&wireFormat.maxFrameSize=104857600 | org.apache.activemq.transport.TransportServerThreadSupport | main
2015-02-27 15:49:06,808 | INFO  | Connector nio+ssl started | org.apache.activemq.broker.TransportConnector | main
2015-02-27 15:49:07,066 | INFO  | Connector https started | org.apache.activemq.broker.TransportConnector | main
2015-02-27 15:49:07,069 | INFO  | Apache ActiveMQ 5.10.0 (NioSsl, ID:SANDBOXFUSEV01-33072-1425073746626-0:1) started | org.apache.activemq.broker.BrokerService | main
2015-02-27 15:49:07,073 | INFO  | For help or more information please see: http://activemq.apache.org | org.apache.activemq.broker.BrokerService | main
2015-02-27 15:49:07,077 | ERROR | Temporary Store limit is 51200 mb, whilst the temporary data directory: /opt/app/amq/Transport/NioSsl/data/NioSsl/tmp_storage only has 9820 mb of usable space - resetting to maximum available 9820 mb. | org.apache.activemq.broker.BrokerService | main
2015-02-27 15:49:07,405 | INFO  | ActiveMQ WebConsole available at http://0.0.0.0:8161/ | org.apache.activemq.web.WebConsoleStarter | main
2015-02-27 15:49:07,449 | INFO  | Initializing Spring FrameworkServlet 'dispatcher' | /admin | main
2015-02-27 15:49:07,634 | INFO  | jolokia-agent: No access restrictor found at classpath:/jolokia-access.xml, access to all MBeans is allowed | /api | main

Note the line of particular interesting:

2015-02-27 15:49:06,803 | INFO  | Listening for connections at: nio+ssl://SANDBOXFUSEV01:61617?maximumConnections=1000&wireFormat.maxFrameSize=104857600 | org.apache.activemq.transport.TransportServerThreadSupport | main
2015-02-27 15:49:06,808 | INFO  | Connector nio+ssl started | org.apache.activemq.broker.TransportConnector | main
2015-02-27 15:49:07,066 | INFO  | Connector https started | org.apache.activemq.broker.TransportConnector | main
2015-02-27 15:49:07,069 | INFO  | Apache ActiveMQ 5.10.0 (NioSsl, ID:SANDBOXFUSEV01-33072-1425073746626-0:1) started | org.apache.activemq.broker.BrokerService | main

The above log indicate the server has started with nio+ssl transport over port 161617

.

Run Producer and Consumer

I create a scirpt name runProducer.sh with the following contents:

#!/bin/bash
ACTIVEMQ_HOME=/opt/app/amq/Transport/NioSsl
ant producer -Durl="nio+ssl://localhost:61617" \
 -Dtopic=false \
 -Ddurable=true \
 -Dsubject=QUEUE.NIOSSL \
 -Dmax=100 \
 -Djavax.net.ssl.keyStore=${ACTIVEMQ_HOME}/conf/client.ks \
 -Djavax.net.ssl.keyStorePassword=amqadmin@ \
 -Djavax.net.ssl.trustStore=${ACTIVEMQ_HOME}/conf/client.ts \
 -Djavax.net.ssl.trustStorePassword=amqadmin@

Run the above script at $ACTIVEMQ_HOME/examples/openwire/swissarmy

The script for running consumer, namely, runConsumer.sh has the following contents:

#!/bin/bash
ACTIVEMQ_HOME=/opt/app/amq/Transport/NioSsl
ant consumer -Durl="nio+ssl://localhost:61617" \
 -Dtopic=false \
 -Ddurable=true \
 -Dsubject=QUEUE.NIOSSL \
 -Djavax.net.ssl.keyStore=${ACTIVEMQ_HOME}/conf/client.ks \
 -Djavax.net.ssl.keyStorePassword=amqadmin@ \
 -Djavax.net.ssl.trustStore=${ACTIVEMQ_HOME}/conf/client.ts \
 -Djavax.net.ssl.trustStorePassword=amqadmin@

If the consumer is running, you can check the connections. The following is what I can see:

Note: the URL takes the following form:

url="nio+ssl://localhost:61617"

Summery

In this blog, I have explained the procedures to setup nio+ssl transport for ActiveMQ with the procedures of testing. This should give us a clear picture on how the nio+ssl transport works

Wednesday, February 25, 2015

Setup JBoss Fuse Service Works In Domain Mode

Introduction

First of all, at this writing, the JBoss FSW does not work in domain mode. Hopefully, in the next release, this issue will be resolved. Run JBoss FSW in domain mode has a lot of advantages over standalone mode, in particular, with respect to the deployment and management.

In this blog, I will look into the details about the domain mode setup for JBoss EAP. In my previous blogs about JBoss FSW, I have covered the following topics:

  1. How to install and start JBoss FSW http://ggl-consulting.blogspot.com/2014/10/jboss-service-works-explained.html
  2. How to build, deploy, and test a simple JBoss FSW applications http://ggl-consulting.blogspot.com/2014/10/build-deploy-test-and-debug-jboss-fuse.html
  3. How to cluster JBoss FSW using TCP stack http://ggl-consulting.blogspot.com/2015/02/clustering-jboss-fsw-switchyard.html
  4. Run JBoss FSW As Service In Standalone Mode http://ggl-consulting.blogspot.com/2015/02/run-jboss-fsw-as-service.html

To setup domain mode, we need the following service components:

  1. Domain Controller: control the service nodes under the domain through the communication between domain controller --> host controller --> service nodes
  2. Host Controller: Responsible for the communication between service nodes and domain controller.
  3. Service Nodes: the container for JEE services.

The Topology

I have configured three RHL sandboxes for the setup of domain mode as shown in the following figure:

Setup Domain Controller

To setup domain controller, we need to edit two files [in my case JBOSS_FSW=/opt/app/fsw]:

$JBOSS_FSW/jboss-eap-6.1/domain/configuration/domain.xml
$JBOSS_FSW/jboss-eap-6.1/domain/configuration/host-master.xml

Modify domain.xml

For domain.xml, the only change need to made is the section of server-groups as the following:

  
    ...


Modify host-master.xml

The only change I need to make is the following line:


In the enterprise application, you may need to adjust the default jvm and ports options. In my previous blogs, I have covered how to enable various tcp ports by using the tool of system-config-firewall.

Add A Domain Admin User

In order for the host controller to communicate with domain controller, domain controller need to know which credential to use. And this is the purpose we have to create a domain admin user. This admin user will also be use to provision JBoss FSW nodes using cli commands as shown in later secsion. Here is the procedure to create doamin admin user:

[fuse@SANDBOXFUSEV04 bin]$ ./add-user.sh

What type of user do you wish to add?
 a) Management User (mgmt-users.properties)
 b) Application User (application-users.properties)
(a): a

Enter the details of the new user to add.
Realm (ManagementRealm) :
Username : domainadmin
Password :
Re-enter Password :
About to add user 'domainadmin' for realm 'ManagementRealm'
Is this correct yes/no? yes
Added user 'domainadmin' to file '/opt/app/fsw/jboss-eap-6.1/standalone/configuration/mgmt-users.properties'
Added user 'domainadmin' to file '/opt/app/fsw/jboss-eap-6.1/domain/configuration/mgmt-users.properties'
Is this new user going to be used for one AS process to connect to another AS process?
e.g. for a slave host controller connecting to the master or for a Remoting connection for server to server EJB calls.
yes/no? yes
To represent the user add the following to the server-identities definition 
[fuse@SANDBOXFUSEV04 bin]$

The last line of stdout contains the following text:


Make sure you save the line, we will need it to configure host controller.

Start Up The Domain Controller

To start the domain controller use the following command:

./domain.sh -b 10.66.13.120 -bmanagement 10.66.13.120 --host-config=host-master.xml

Note: the 10.66.13.120 is the ip address of the host of domain controller. You may setup service daemon as I did for standalone mode in the blog: http://ggl-consulting.blogspot.com/2015/02/run-jboss-fsw-as-service.html

Check The Domain Controller Using Web Browser

After starting the domain controller, we can check the status of the domain controller by enter the the url: sandboxfuse02:9990/console. It will promote login. You can use the domain admin credential or the one we setup earlier during the installation. The web browser should should the following.

As you can see, there is not server connected to the domain controller yet. This will change after we setup and start the host controller.

Setup Host Controller

Configuration

The only file to be modified in order to setup host controller is:

$JBOSS_FSW/jboss-eap-6.1.0/domain/configuration/host-slave.xml

There are three places need to be modify in the host-slave.xml as the follows:


    ...


    ....


    ...


  1. The is obtained during our creation of domainadmin user.
  2. In the domain-controller part, I add username="domainadmin". To me this should be put inside the server-identities.
  3. The last part is to define servers controlled by the host controller.

Start Host Controller

The host controller can be started using the following command:

./domain.sh -b 10.66.13.108 -bmanagement 10.66.13.108 -Djboss.domain.master.address=10.66.13.120 --host-config=host-slave.xml

Do the exactly the same for the other host controller. In my case the host controller will run on the host sandboxfusev04. As I start and stop the host congtroller, I can see the following stdout from the domain controller.

[Host Controller] 09:46:26,318 INFO  [org.jboss.as.domain] (slave-request-threads - 1) JBAS010918: Registered remote slave host "sandboxfusev03", JBoss Red Hat JBoss Fuse Service Works 6.0.0.GA-redhat-2 (AS 7.2.1.Final-redhat-10)
[Host Controller] 09:47:17,631 INFO  [org.jboss.as.domain] (slave-request-threads - 1) JBAS010918: Registered remote slave host "sandboxfusev04", JBoss Red Hat JBoss Fuse Service Works 6.0.0.GA-redhat-2 (AS 7.2.1.Final-redhat-10)
[Host Controller] 11:51:06,139 INFO  [org.jboss.as.domain] (Remoting "sandboxfusev02:MANAGEMENT" task-1) JBAS010925: Unregistered remote slave host "sandboxfusev03"
[Host Controller] 11:51:11,160 INFO  [org.jboss.as.domain] (Remoting "sandboxfusev02:MANAGEMENT" task-3) JBAS010925: Unregistered remote slave host "sandboxfusev04"

Looking Inside

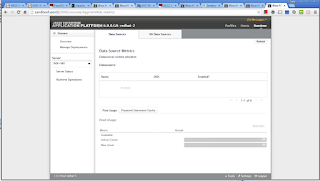
After starting both host controller, we can also check the server status by using be web brower. First, let view the domain information from the domain controller as shown in the figure below:

We can see that two hosts are added: sandboxfusev03, sandboxfusev04. If we want to change the host name, we can add name="..." into host-slave.xml.

Summary

In this blog, I have covered the configuration of JBoss FSW in domain mode. In order to get familiarized the JBoss FSW, you may look into the log. If you encounter a problem, you should increase the level of server log by modifying logging.properties which is also under domain/configuration. You should also check which ports are open from firewall by using the command:
sudo iptables -L -v -n

Saturday, February 21, 2015

Run JBoss FSW As Service In Standalone Mode

Introduction

In my previous blogs about JBoss Fuse Service Works [JBOss FSW], I have covered the following topics:

  1. How to install and start JBoss FSW http://ggl-consulting.blogspot.com/2014/10/jboss-service-works-explained.html
  2. How to build, deploy, and test a simple JBoss FSW application http://ggl-consulting.blogspot.com/2014/10/build-deploy-test-and-debug-jboss-fuse.html
  3. How to cluster JBoss FSW using TCP stack http://ggl-consulting.blogspot.com/2015/02/clustering-jboss-fsw-switchyard.html

In this blog, I am going to cover the topic about running the JBoss FSW as daemon or service in RedHat Linux [RHL] environment

Configurations and Scripts

The standard distribution of JBOss FSW comes with two scripts at /opt/app/fsw/jboss-eap-6.1/bin/init.d as shown below:

[fuse@DEVRHFUSEV02 init.d]$ ls -lart
total 28
drwxr-xr-x. 4 fuse users 4096 Jan  8 08:13 ..
-rw-r--r--. 1 fuse users  369 Feb 21 13:05 jboss-as.conf.original
-rw-r--r--. 1 fuse users 3838 Feb 21 13:05 jboss-as-domain.sh
-rwxr-xr-x. 1 fuse users 3763 Feb 21 13:05 jboss-as-standalone.sh
-rwxr-xr-x. 1 fuse users 3672 Feb 21 13:05 jboss-as-standalone.sh.original
-rw-r--r--. 1 fuse users  607 Feb 21 13:06 jboss-as.conf
drwxr-xr-x. 2 fuse users 4096 Feb 21 13:06 .
[fuse@DEVRHFUSEV02 init.d]$

In order the run the JBoss FSW as daemon service, we need to modify the two files jboss-as.conf and jboss-as-standalone.sh as the following:

[fuse@DEVRHFUSEV02 init.d]$ cat jboss-as.conf
# General configuration for the init.d scripts,
# not necessarily for JBoss AS itself.

# The username who should own the process.
#
# JBOSS_USER=jboss-as

# The amount of time to wait for startup
#
# STARTUP_WAIT=30

# The amount of time to wait for shutdown
#
# SHUTDOWN_WAIT=30

# Location to keep the console log
#
#

JBOSS_USER=fuse

JBOSS_HOME=/opt/app/fsw/jboss-eap-6.1

JBOSS_CONSOLE_LOG=${JBOSS_HOME}/standalone/log/console.log

JBOSS_CONFIG=standalone-full-ha.xml

JBOSS_START_OPTIONS="-b 10.66.13.111 -bmanagement 10.66.13.111"

JBOSS_PIDFILE=${JBOSS_HOME}/standalone/log/jboss-as-standalone.pid
[fuse@DEVRHFUSEV02 init.d]$

The only place need to change for the file of jboss-as-standalone.sh is at line 54 as the following:

 JBOSS_SCRIPT="$JBOSS_HOME/bin/standalone.sh $JBOSS_START_OPTIONS"

After modifying the scripts and configuration, we need to create soft link at /etc/init.d as the followiing:

cd /etc/init.d
sudo ln -s /opt/app/fsw/jboss-eap-6.1/bin/init.d/jboss-as-standalone.sh jboss-fsw

Start and Stop JBoss FSW As Daemon

In my case, I run the JBoss FSW with the use named "fuse". To start the JBoss FSW using the following commands:

fuse@DEVRHFUSEV04 init.d]$ sudo service jboss-fsw start
[sudo] password for fuse:
Starting jboss-as:                                         [  OK  ]
[fuse@DEVRHFUSEV04 init.d]$

Note: it may take few second to get prompt back as the process starting up take some time. To stop the service just replace the "start" with "stop"

Automatically Start The Server After Server Reboot

Obviously, we need to configure the service to allow service to start after the Linux server reboot. To achieve this, we need to run the following commands:

sudo chkconfig --add jboss-fsw
sudo chkconfig jboss-fsw on

[fuse@DEVRHFUSEV01 init.d]$ sudo chkconfig --list | egrep jboss-fsw
[sudo] password for fuse:
jboss-fsw       0:off   1:off   2:on    3:on    4:on    5:on    6:off
[fuse@DEVRHFUSEV01 init.d]$

Sunday, February 15, 2015

Clustering JBoss FSW Switchyard Using TCP Stack

Introduction

I have explained how to install JBoss Fuse Service Work and how to deploy a switchyard project in my previous blogs:
In this blog, I am going to explain the procedures to setup switchyard clustering in standalone mode.

Server Information

I have two Linux Servers with following information:
  • OS: Red Hat Enterprise Linux Server release 6.6 (Santiago)
  • JBOSS_HOME: /opt/app/fsw/jboss-eap-6.1
  • java version: "1.7.0_71"

Firewall Changes

Make sure the following ports are open
$ sudo iptables -L -v -n | egrep NEW
    2   148 ACCEPT     tcp  --  *      *       0.0.0.0/0            0.0.0.0/0           state NEW tcp dpt:22
 3489  295K ACCEPT     udp  --  *      *       0.0.0.0/0            0.0.0.0/0           state NEW udp dpt:161
    0     0 ACCEPT     tcp  --  *      *       0.0.0.0/0            0.0.0.0/0           state NEW tcp dpt:8181
    0     0 ACCEPT     tcp  --  *      *       0.0.0.0/0            0.0.0.0/0           state NEW tcp dpt:8080
    0     0 ACCEPT     tcp  --  *      *       0.0.0.0/0            0.0.0.0/0           state NEW tcp dpt:631
    0     0 ACCEPT     tcp  --  *      *       0.0.0.0/0            0.0.0.0/0           state NEW tcp dpt:25
    0     0 ACCEPT     tcp  --  *      *       0.0.0.0/0            0.0.0.0/0           state NEW tcp dpt:4447
    0     0 ACCEPT     tcp  --  *      *       0.0.0.0/0            0.0.0.0/0           state NEW tcp dpt:900
    0     0 ACCEPT     tcp  --  *      *       0.0.0.0/0            0.0.0.0/0           state NEW tcp dpt:5445
    0     0 ACCEPT     tcp  --  *      *       0.0.0.0/0            0.0.0.0/0           state NEW tcp dpt:9990
    0     0 ACCEPT     tcp  --  *      *       0.0.0.0/0            0.0.0.0/0           state NEW tcp dpt:37063
    0     0 ACCEPT     tcp  --  *      *       0.0.0.0/0            0.0.0.0/0           state NEW tcp dpt:3528
    0     0 ACCEPT     tcp  --  *      *       0.0.0.0/0            0.0.0.0/0           state NEW tcp dpt:9999
    0     0 ACCEPT     tcp  --  *      *       0.0.0.0/0            0.0.0.0/0           state NEW tcp dpt:5455
    0     0 ACCEPT     tcp  --  *      *       0.0.0.0/0            0.0.0.0/0           state NEW tcp dpt:111
    2   120 ACCEPT     tcp  --  *      *       0.0.0.0/0            0.0.0.0/0           state NEW tcp dpt:7600
    0     0 ACCEPT     udp  --  *      *       0.0.0.0/0            0.0.0.0/0           state NEW udp dpt:55200
the port 7600 and 55200 are used for tcp and udp stack repectively.if additional ports need to be open, there are two way to open new ports. The first option is to use the system-config-firewall GUI. The second one is to modify the file of /etc/sysconfig/iptables.

Modify HA Configuration File

Modify the file of ${JBOSS_HOME}/standalone/configuraiton/standalone-full-ha.xml as the following:


                    devrhfusev01.tmghealth.com[7600],devrhfusev02.tmghealth.com[7600]
                    2
                    0
                    2000


The out-of-box transport stack is UDP. We have to change the default-stack="udp" to default-stack="tcp". Also we add a new section:

               
                    devrhfusev01.tmghealth.com[7600],devrhfusev02.tmghealth.com[7600]
                    2
                    0
                    2000
                

With that the configuration part is done. Make sure modify all the file of standalone-full-ha.xml on each host which will be participating the cluster.

Server Startup Option

Start Server One

$ bin/standalone.sh -b 10.66.13.110 -bmanagement 10.66.13.110 -c standalone-full-ha.xml

where 10.66.13.110 is et0 interface I want to bind

Start Server Two

$ bin/standalone.sh -b 10.66.13.111 -bmanagement 10.66.13.111 -c standalone-full-ha.xml

After two servers are started, you can check the ${JBOSS_HOME}/standalone/log/server.log, and you should see the something like:

10:12:55,663 INFO  [org.infinispan.remoting.transport.jgroups.JGroupsTransport] (ServerService Thread Pool -- 66) ISPN000094: Received new cluster view: [devrhfusev02/switchyard|1] [devrhfusev02/switchyard, devrhfusev01/switchyard]

Noted that devrhfusev01 and devrhfusev02 are the node name. By default it is the host name. If you want to define the node name, you can pass the command option with -Djboss.node.name=MY-FAVORATE-NODE-NAME

Check What Ports Are Open

It is always a good practice to check how the two servers are connected. To do this, we can use the following command:

[fuse@DEVRHFUSEV01 log]$ lsof -iTCP -P | egrep EST | egrep -v grep
java    16053 fuse  504u  IPv4 24568988      0t0  TCP devrhfusev01.tmghealth.com:7600->devrhfusev02.tmghealth.com:53845 (ESTABLISHED)
java    16053 fuse  505u  IPv4 24568989      0t0  TCP devrhfusev01.tmghealth.com:38526->devrhfusev02.tmghealth.com:57600 (ESTABLISHED)
java    16053 fuse  506u  IPv4 24568990      0t0  TCP devrhfusev01.tmghealth.com:57600->devrhfusev02.tmghealth.com:44482 (ESTABLISHED)

You may wonder why the devrhfusev02 using 53845 to connect devrhfusev01:7600. This is because the server on devrhfusev01 is started first. The second server can choose any port to connect the remote server. Basically, the server started latest will initiate connection.

Error Handling and Trouble Shooting

If you don't see the establish connections between the two clustering nodes, you may check the following:

  • Are the ports open from the firewall? [use iptables -L -v -n to check what ports are open]
  • Is the binding interface correct? [us ifconfig -a command and look eth0 interface ip address]

Anypoint Studio Error: The project is missing Munit lIbrary to run tests

Anypoint Studio 7.9 has a bug. Even if we following the article: https://help.mulesoft.com/s/article/The-project-is-missing-MUnit-libraries-...